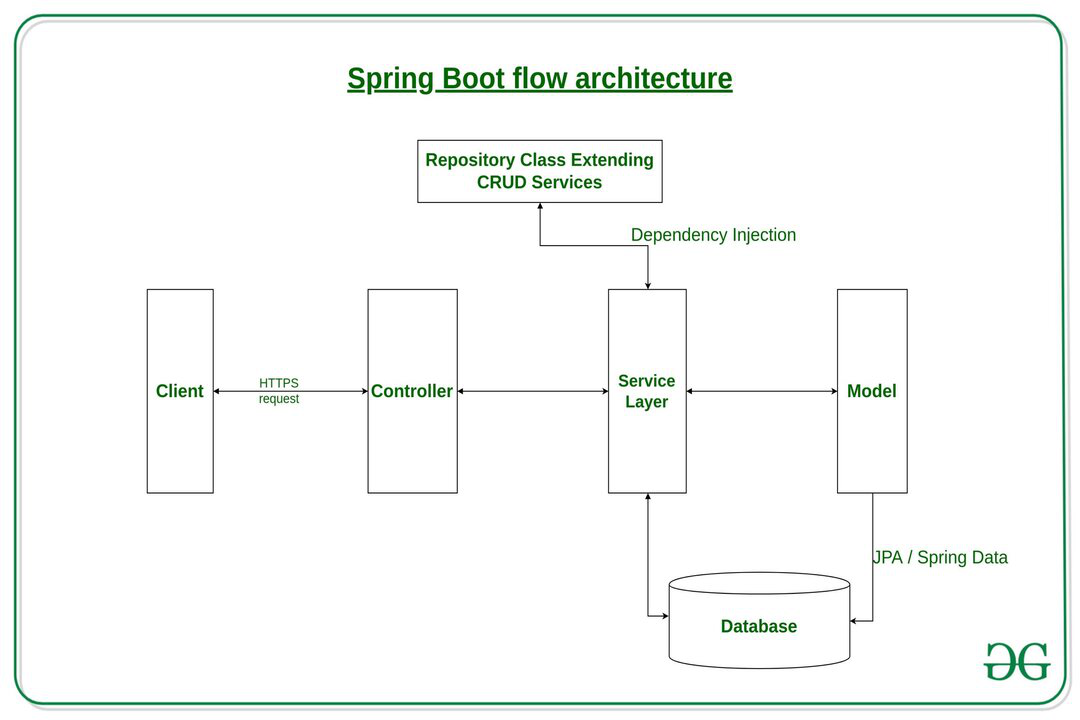
Spring Boot란?
- 오픈 소스 Java 기반 프레임워크
- Spring을 더 쉽게 이용하기 위한 도구
- Spring에서 설정해야 할 의존성 관리나 실행환경등을 자동화 시킴
- 개발자가 비즈니스 로직 개발에만 집중할 수 있도록 만들어줌
- WAS를 자체적으로 가지고 있어서 jar파일만 만들면 별도의 WAS 설정 없이 애플리케이션 실행 가능(상황에 필요한 WAS 선택 가능)
Thymeleaf
- 템플릿 엔진의 일종
- 백엔드 서버에서 HTML을 동적으로 렌더링하는 용도로 사용한다.
- 네츄럴 템플릿이다. - 순수 HTML을 최대한 유지하면서 뷰 템플릿도 사용할 수 있게 한다.
- 스프링과 통합되어 있어 스프링의 다양한 기능을 편리하게 사용할 수 있다.
- HTML 태그에 th:* 속성을 지정해서 사용한다.
JPA
- Java에서 ORM 기술 표준으로 사용하는 인터페이스 모음
- ORM은 Object Relation Mapping 의 줄임말(객체 관계 매핑)
- 자바 어플리케이션에서 관계형 데이터 베이스를 사용하는 방식을 정의한 인터페이스
- Hibernate, OpenJPA 등이 JPA를 구현한다.
- 매핑된 관계를 이용해서 SQL을 생성하고 실행하는데 반복적인 CRUD SQL을 처리해준다
- 관계 매핑이 어렵거나 성능에 대한 이슈가 우려되는 경우는 SQL을 직접 작성할 수 있는 네이티브 SQL이란 기능을 제공한다.
- 객체 중심으로 개발을 하기 때문에 생산성과 유지보수도 수월하다.
게시판 만들기
1. 종속성 과 DB 설정하기
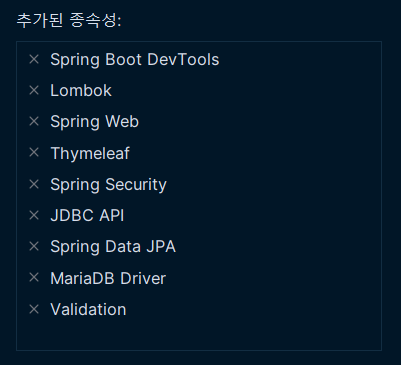
application.properties 내용 추가
spring.application.name=myhome
spring.datasource.url=해당 되는 DB 주소 적기
spring.datasource.username=아이디 적기
spring.datasource.password=비번 적기
spring.datasource.driver-class-name=org.mariadb.jdbc.Driver
2. @Controller 만들기
@Controller
public class HomeController {
    @GetMapping
    public String index(){
        return "index";
    }
}
3.index.html 만들기
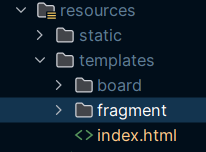
4. 타임리프를 사용해서 fragment 만들기
- 사용하기 전에 공식문서 부터 확인하기
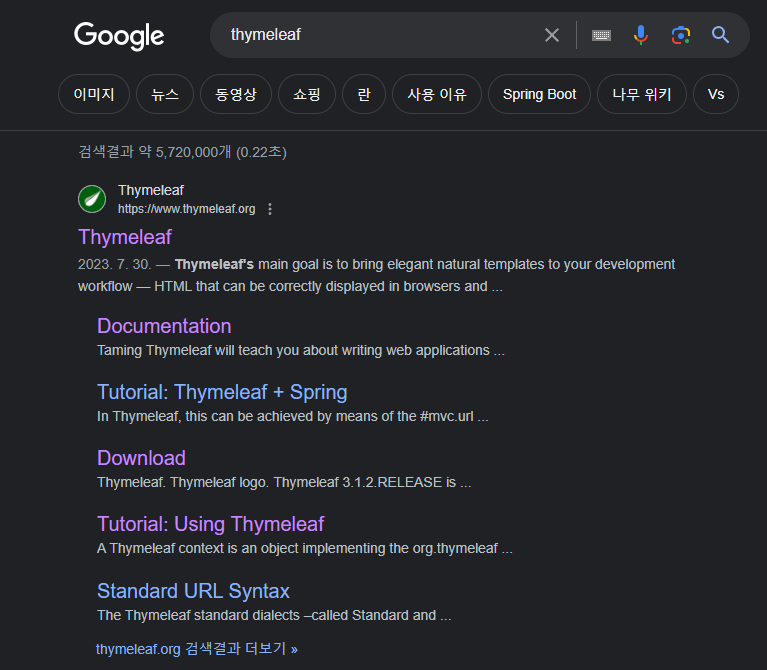
- 공식홈페이지에서 문서확인하기
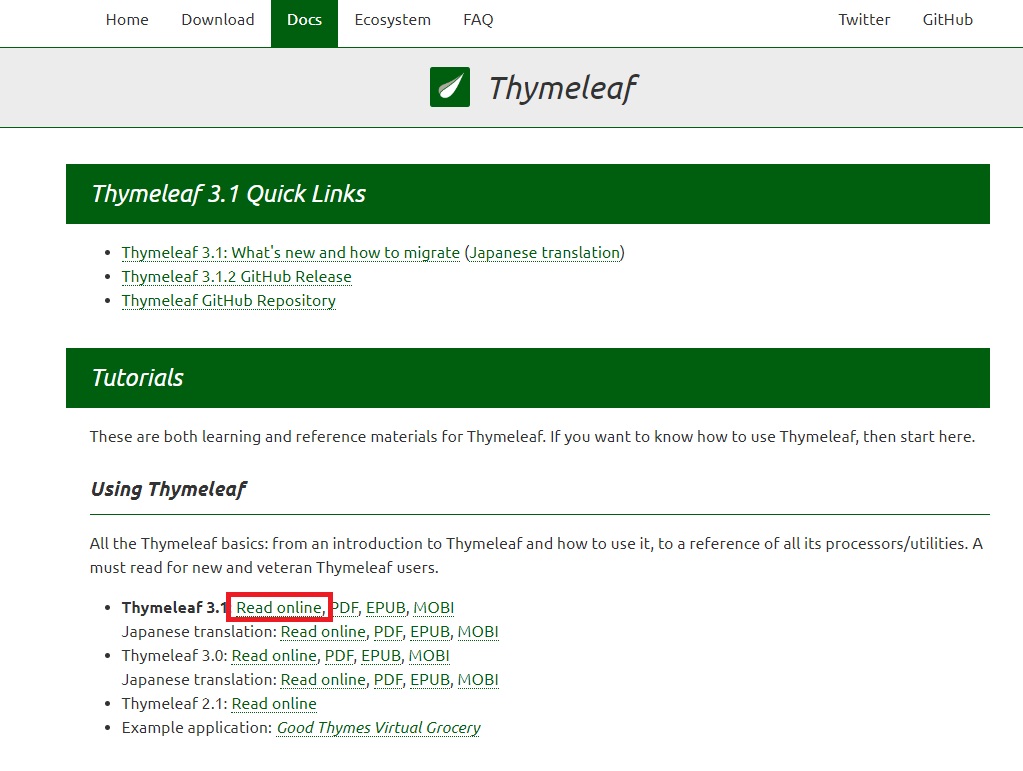
- 원하는 문법 찾아서 적용해보기
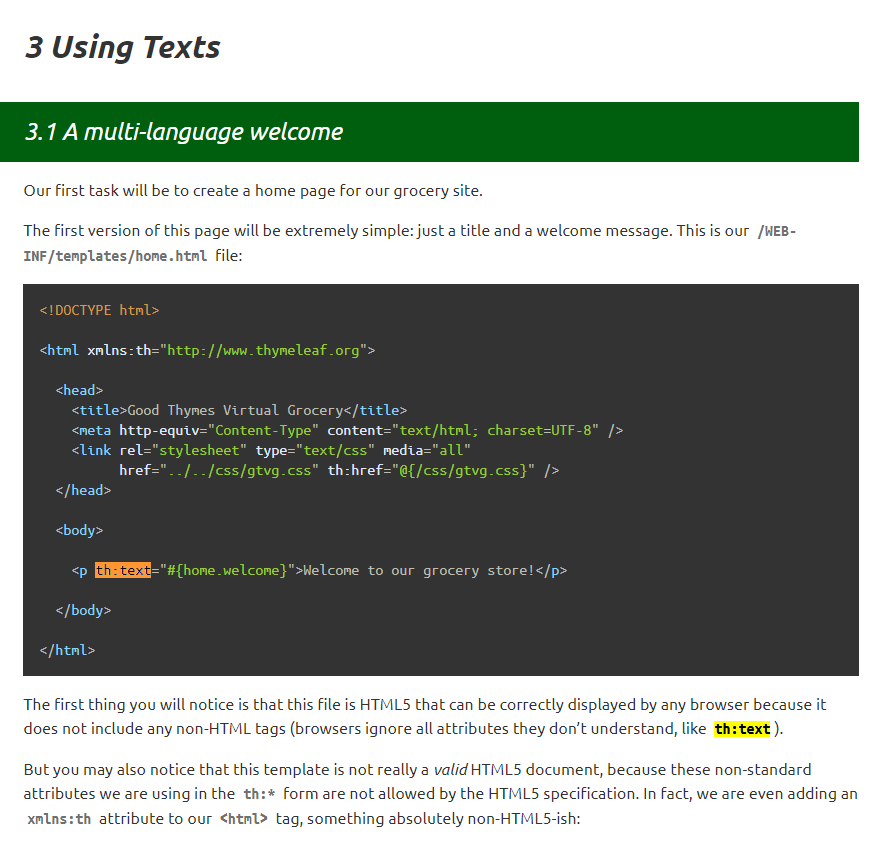
- 공통화할 부분 fragment 만들기 → th:fragment = "fragment이름(파라미터-생략해도됨)"
<!DOCTYPE html>
<html xmlns:th="http://www.thymeleaf.org">
<head th:fragment="head(title)">
    <meta charset="utf-8"/>
    <meta content="width=device-width, initial-scale=1" name="viewport"/>
    <title th:text="${title}">Hello SprignBoot</title> <!-- head의 타이틀은 달라야해서 적용함. -->
    <link href="navbars.css" rel="stylesheet"/>
    <link crossorigin="anonymous"
          href="https://cdn.jsdelivr.net/npm/bootstrap@5.3.3/dist/css/bootstrap.min.css"
          integrity="sha384-QWTKZyjpPEjISv5WaRU9OFeRpok6YctnYmDr5pNlyT2bRjXh0JMhjY6hW+ALEwIH"
          rel="stylesheet"/>
</head>
- fragment 삽입하기 → th:replace = "fragment 경로 :: fragment이름(파라미터 유무에 따라 작성)"
- th:replace - 태그를 지정된 fragment로 바꾼다.
- th:insert - 지정된 fragment를 태그의 본문으로 삽입한다.
<!-- 예시 -->
<footer th:fragment="copy">
© 2011 The Good Thymes Virtual Grocery
</footer><!-- 예시 -->
<body>
...
<div th:insert="~{footer :: copy}"></div>
<div th:replace="~{footer :: copy}"></div>
</body><!-- 예시 코드 결과 -->
<body>
...
<div>
<footer>
© 2011 The Good Thymes Virtual Grocery
</footer>
</div>
<footer>
© 2011 The Good Thymes Virtual Grocery
</footer>
</body>
<!--적용하기-->
<!doctype html>
<html xmlns:th="http://www.thymeleaf.org">
  <head th:replace="fragment/common :: head('Hello Spring ')">
  </head>
5. 레이아웃 만들기(부트 스트랩 이용)
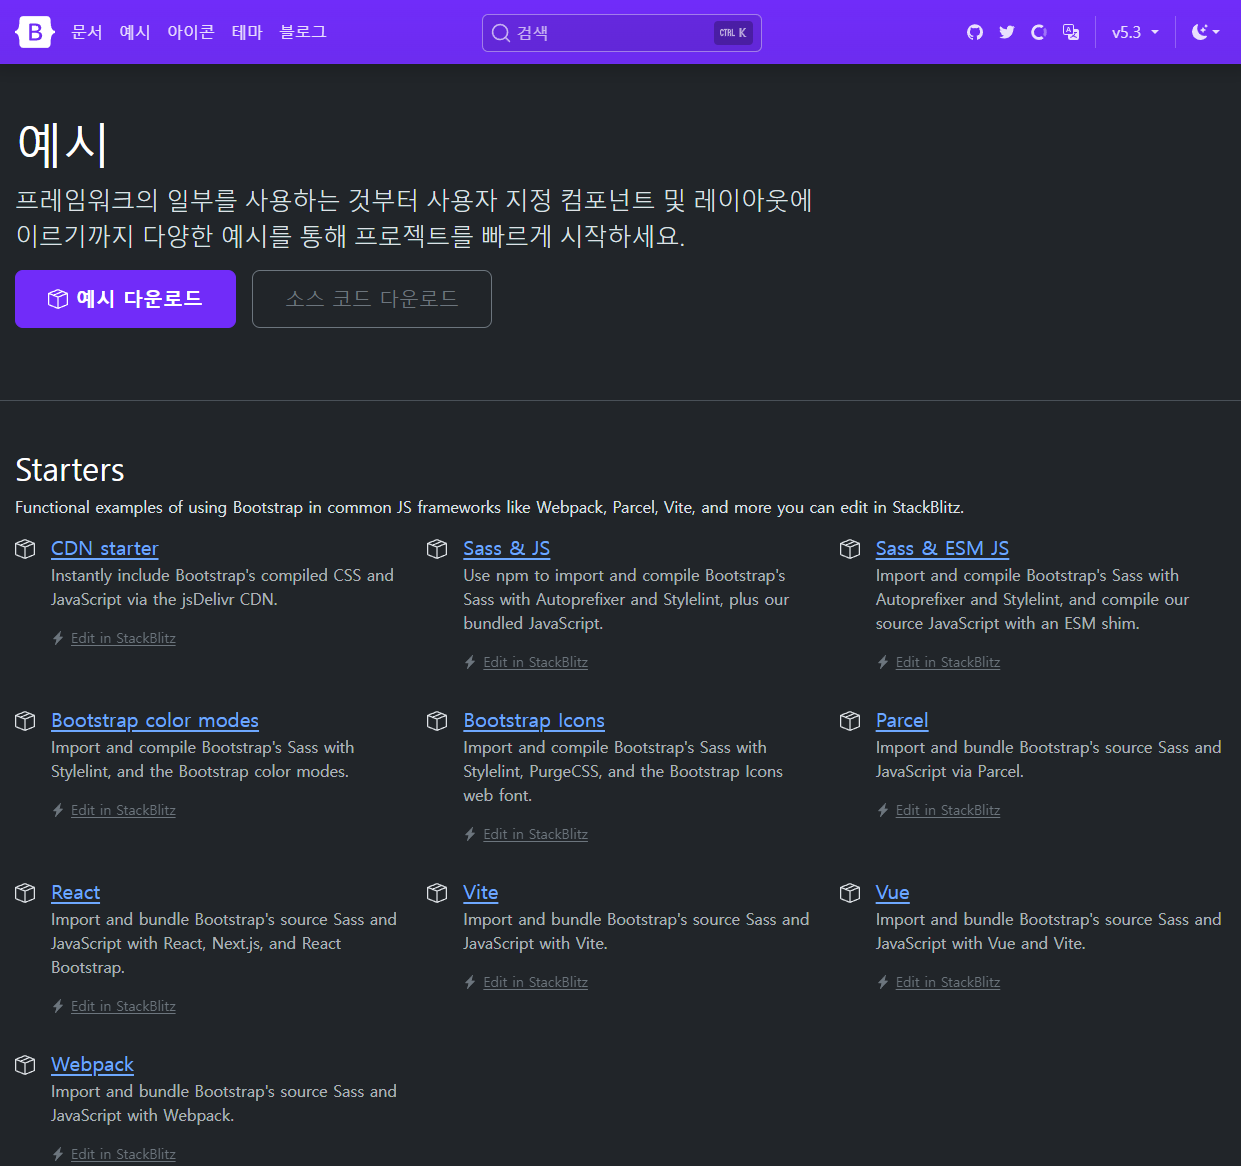
- 레이아웃 기본

6. 홈과 게시판 연결하기 href → th:href="@{주소}"
<div class="collapse navbar-collapse" id="navbarsExample09">
    <ul class="navbar-nav me-auto mb-2 mb-lg-0">
        <li class="nav-item" th:classappend="${menu} == 'home' ? 'active': ''">
            <a class="nav-link" th:href="@{/}">홈<span class="sr-only" th:if="${menu} == 'home'"></span></a>
        </li>
        <li class="nav-item"
            th:classappend="${menu} == 'board' ? 'active' : ''">
            <a class="nav-link" th:href="@{/board/list}">게시판<span class="sr-only" th:if="${menu} == 'board'"></span></a>
        </li>
    </ul>
</div>
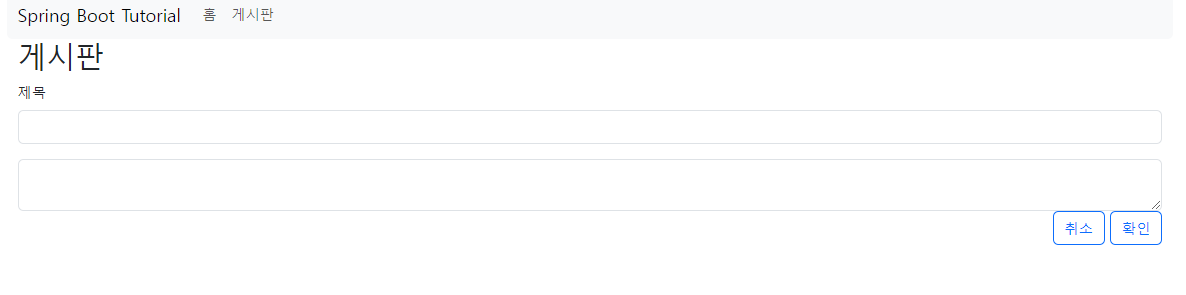
7. 게시판 쓰기 화면만들기 - class 속성에 추가하기 th:classappend="속성"
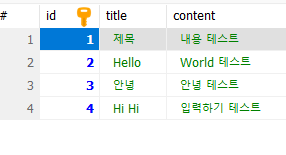
//Board.java 코드

@Entity
@Data
public
class Board {
    @Id
    @GeneratedValue(strategy = GenerationType.IDENTITY)
    private Long id;
    @NotNull
    @Size(min=2, max=30, message = "제목은 2자 이상 30자 이하 입니다.")
    private String title;
    private String content;
}
// Controller 부분
@PostMapping("/form")
public String boardSubmit(@Valid Board board, BindingResult bindingResult){
boardValidator.validate(board, bindingResult);
if (bindingResult.hasErrors()){
return "board/form"; 에러 나면 게시판 쓰기 화면에 머무르기
}
boardRepository.save(board); 저장하기
return "redirect:/board/list"; 저장 후 게시판으로 가기
}
<!-- form.html 코드 일부분 -->
<!doctype html>
<html xmlns:th="http://www.thymeleaf.org">
<head th:replace="fragment/common :: head('게시판')">
</head>
<body>
<div class="container">
    <div th:insert="~{fragment/common :: Menu(menu)}"></div>
    <div class="container">
        <h2>게시판</h2>
        <form action="#" method="post" th:action="@{/board/form}" th:object="${board}">
            <input th:field="*{id}" type="hidden">
            <div class="mb-3">
                <label class="form-label" for="title">제목</label>
                <input aria-describedby="emailHelp" class="form-control"
                       id="title" th:classappend="${#fields.hasErrors('title')} ? 'is-invalid'" th:field="*{title}" type="text">
                <div class="invalid-feedback" id="validationServer03Feedback" th:errors="*{title}" th:if="${#fields.hasErrors('title')}">
                    제목 에러 메세지
                </div>
            </div>
            <div class="form-floating">
              <textarea class="form-control" id="content" rows="3" th:classappend="${#fields.hasErrors('content')} ? 'is-invalid'"
                        th:field="*{content}"></textarea>
                <div class="invalid-feedback" id="validationServer03Feedback" th:errors="*{content}" th:if="${#fields.hasErrors('content')}">
                    내용 에러 메세지
                </div>
            </div>
            <div class="text-end">
                <a class="btn btn-outline-primary" th:href="@{/board/list}" type="button">취소</a>
                <button class="btn btn-outline-primary" type="submit">확인</button>
            </div>
        </form>
    </div>
</div>
</body>
</html>
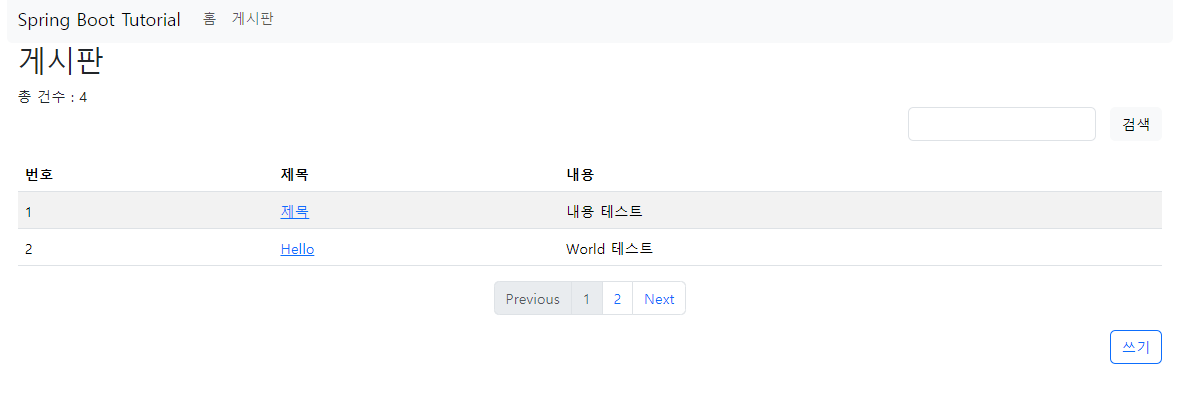
8. 게시판 검색하기(제목과 내용) - 파라미터 값 넘기기 th:value="${param.변수명}"
// Controller 만들기
@GetMapping("/list")
public String list(Model model, @PageableDefault(size = 2) Pageable pageable,
                   @RequestParam(required = false, defaultValue = "") String searchText){
//        Page<Board> boards = boardRepository.findAll(pageable);
    Page<Board> boards = boardRepository.findByTitleContainingOrContentContaining(searchText, searchText, pageable);
    int startPage = Math.max(1, boards.getPageable().getPageNumber() - 4);
    int endPage = Math.min(boards.getTotalPages(), boards.getPageable().getPageNumber() + 4);
    model.addAttribute("startPage", startPage);
    model.addAttribute("endPage", endPage);
    model.addAttribute("boards", boards);
    return "board/list";
}
<!-- list.html 코드 일부분 -->
<form class="row g-3 d-flex justify-content-end" method="GET" th:action="@{/board/list}">
    <div class="col-auto">
        <label class="visually-hidden" for="searchText">검색</label>
        <input class="form-control" id="searchText" name="searchText" th:value="${param.searchText}" type="text">
    </div>
    <div class="col-auto">
        <button class="btn btn-light mb-3" type="submit">검색</button>
    </div>
</form>

9. 페이지 처리하기 - 반복문 사용 - th:each="변수 :${반복변수 호출}"
스프링 부트 공식 문서에 가면 JPA로 페이지 처리를 할수 있는 interface가 있다.
매개변수를 pageable 주고 Page 타입으로 받을 수 있다.
public interface PagingAndSortingRepository<T, ID>  {

  Iterable<T> findAll(Sort sort);

  Page<T> findAll(Pageable pageable);
}
size나 page를 따로 선언하지 않으면 default값으로 전달한다
//
// Source code recreated from a .class file by IntelliJ IDEA
// (powered by FernFlower decompiler)
//

package org.springframework.data.web;

import java.lang.annotation.Documented;
import java.lang.annotation.ElementType;
import java.lang.annotation.Retention;
import java.lang.annotation.RetentionPolicy;
import java.lang.annotation.Target;
import org.springframework.core.annotation.AliasFor;
import org.springframework.data.domain.Sort;
import org.springframework.data.domain.Sort.Direction;

@Documented
@Retention(RetentionPolicy.RUNTIME)
@Target({ElementType.PARAMETER})
public @interface PageableDefault {
    @AliasFor("size")
    int value() default 10;

    @AliasFor("value")
    int size() default 10;

    int page() default 0;

    String[] sort() default {};

    Sort.Direction direction() default Direction.ASC;
}
<!-- list.html 코드 일부분 -->
<nav aria-label="Page navigation example">
    <ul class="pagination justify-content-center">
        <li class="page-item" th:classappend="${1 == boards.pageable.pageNumber + 1} ? 'disabled'">
            <a class="page-link" tabindex="-1" th:href="@{/board/list(page=${boards.pageable.pageNumber - 1}, searchText=${param.searchText})}">Previous</a>
        </li>
        <li class="page-item" th:classappend="${i == boards.pageable.pageNumber + 1} ? 'disabled'"
            th:each="i: ${#numbers.sequence(startPage, endPage)}"><a class="page-link" th:href="@{/board/list(page=${i - 1}, searchText=${param.searchText})}" th:text="*{i}">1</a></li>
        <li class="page-item" th:classappend="${boards.totalPages == boards.pageable.pageNumber + 1} ? 'disabled'">
            <a class="page-link" th:href="@{/board/list(page=${boards.pageable.pageNumber + 1}, searchText=${param.searchText})}">Next</a>
        </li>
    </ul>
</nav>
// BoardController 코드 일부분
@GetMapping("/list")
public String list(Model model, @PageableDefault(size = 2) Pageable pageable,
                   @RequestParam(required = false, defaultValue = "") String searchText){
//        Page<Board> boards = boardRepository.findAll(pageable);
    Page<Board> boards = boardRepository.findByTitleContainingOrContentContaining(searchText, searchText, pageable);
    int startPage = Math.max(1, boards.getPageable().getPageNumber() - 4);
    int endPage = Math.min(boards.getTotalPages(), boards.getPageable().getPageNumber() + 4);
    model.addAttribute("startPage", startPage);
    model.addAttribute("endPage", endPage);
    model.addAttribute("boards", boards);
    return "board/list";
}

// 페이지 처리하기 위한 코드
int startPage = Math.max(1, boards.getPageable().getPageNumber() - 4);
int endPage = Math.min(boards.getTotalPages(), boards.getPageable().getPageNumber() + 4);
model.addAttribute("startPage", startPage);
model.addAttribute("endPage", endPage);
model.addAttribute("boards", boards);
참고한 사이트
https://spring.io/guides/gs/serving-web-content
Getting Started | Serving Web Content with Spring MVC
Static resources, including HTML and JavaScript and CSS, can be served from your Spring Boot application by dropping them into the right place in the source code. By default, Spring Boot serves static content from resources in the classpath at /static (or
spring.io
https://www.geeksforgeeks.org/spring-boot-architecture/?ref=lbp
Spring Boot - Architecture - GeeksforGeeks
A Computer Science portal for geeks. It contains well written, well thought and well explained computer science and programming articles, quizzes and practice/competitive programming/company interview Questions.
www.geeksforgeeks.org
Thymeleaf
Integrations galore Eclipse, IntelliJ IDEA, Spring, Play, even the up-and-coming Model-View-Controller API for Java EE 8. Write Thymeleaf in your favourite tools, using your favourite web-development framework. Check out our Ecosystem to see more integrati
www.thymeleaf.org
https://getbootstrap.kr/docs/5.3/getting-started/introduction/
Bootstrap 시작하기
Bootstrap은 강력하고 기능이 풍부한 프론트엔드 툴킷입니다. 프로토타입부터 프로덕션까지 뭐든지 빠르게 빌드해보세요.
getbootstrap.kr
Tutorial: Using Thymeleaf
1 Introducing Thymeleaf 1.1 What is Thymeleaf? Thymeleaf is a modern server-side Java template engine for both web and standalone environments, capable of processing HTML, XML, JavaScript, CSS and even plain text. The main goal of Thymeleaf is to provide a
www.thymeleaf.org
Open Source Database (RDBMS) for the Enterprise | MariaDB
MariaDB provides enterprise open source database and cloud managed database services to support scalability, mission-critical deployments, and more.
mariadb.com
https://youtu.be/FYkn9KOfkx0?si=LHZbt9sFURvR9IqO
https://melonicedlatte.com/2021/07/11/174700.html
스프링(Spring), 스프링 부트(Spring Boot)란? 개념 정리 - Easy is Perfect
melonicedlatte.com
https://yozm.wishket.com/magazine/detail/2115/
스프링 부트 시작할 때 알아야 하는 것 | 요즘IT
스프링은 장점이 많은 개발 도구이지만 설정이 매우 복잡하다는 단점이 있습니다. 그래서 스프링을 개발팀에서도 이런 단점을 인식하고 단점을 보완하고자 스프링 부트를 출시했습니다. 스프
yozm.wishket.com
Thymeleaf(타임리프)란 ? 타임리프의 기본 기능알아보기
Thymeleaf(타임리프)란 ? 타임리프는 JSP, Freemarker와 같은 템플릿 엔진의 일종으로 다음과 같은 특징을 갖고 있습니다. 서버 사이드 HTML 렌더링 (SSR) 백엔드 서버에서 HTML을 동적으로 렌더링 하는 용
hstory0208.tistory.com
[Spring JPA] JPA 란?
이번 글에서는 JPA(Java Persistence API)가 무엇인지 알아보려고한다. JPA는 자바 진영에서 ORM(Object-Relational Mapping) 기술 표준으로 사용되는 인터페이스의 모음이다. 그 말은 즉, 실제적으로 구현된것이
dbjh.tistory.com
'스터디일지 > JAVA SPRING' 카테고리의 다른 글
| [Spring] Maven으로 프로젝트 생성하기 (0) | 2024.03.18 |
|---|---|
| [Java Spring] 1 주차 강의 과제하기 (0) | 2023.08.28 |
| [Java Spring] 입문 1 주차 강의 - PART 2 (0) | 2023.08.26 |
| [Java Spring] 입문 1 주차 강의 PART - 1 (0) | 2023.08.25 |


